
The Lab: Making Our Own Menorah (Step-by-Step)
Dec 12, 2020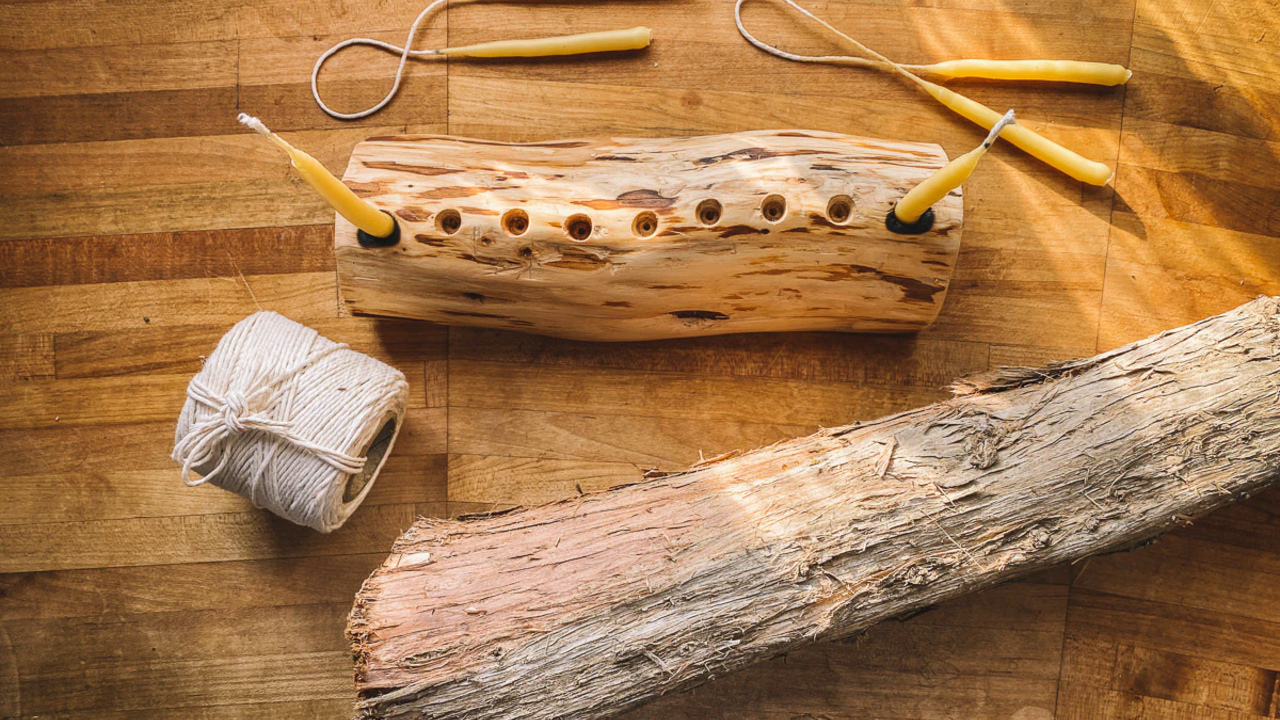
If you’re looking for some cozy winter DIY inspiration, menorah making (or candle holder construction, if you don’t celebrate Hanukkah but still like alliteration) is a great done-in-a-day project. We had this beautiful piece of juniper sitting in our shed that was calling out to be a menorah this year.
Step 1: Find an appealing stick or piece of scrap wood. It should be at least 2 inches wide/thick and 10 inches long. Getting to go on a hike is a bonus part of this project.
Step 2: Cut the wood to 10 inches in length and make sure it sits flat and won’t wobble. This is the trickiest part of the assignment. Parental help and power tools will likely be needed. Unless you start with a stick that doesn’t tip.
Step 3 (optional): Trim, sand, and oil the wood to make it pretty. Or go with the rough-hewn look.
Step 4: Measure out your 9 candle locations. If you cut the wood to 10 inches you can start ½ inch in on each side and put an inch between marks.
Step 5: Using a power drill with a large enough bit for your candles, drill holes about ½ inch deep at each of your marks.
Mazel tov! You are ready to celebrate the festival of lights.
Note: If you are worried about the candles burning your wood when they burn low, you can add bits of foil into the holes. This also makes wax cleanup easier.

The original materials

Trimming and sanding

Candle-making with leftover wax from candle ends was also part of this project.

Happy Hannukah!
What are your favorite holiday DIY projects?
Leading teachers, life-changing courses...
Your path to a happier, healthier life
Get access to our library of over 100 courses on health and nutrition, spirituality, creativity, breathwork and meditation, relationships, personal growth, sustainability, social impact and leadership.
Stay connected with Commune
Receive our weekly Commusings newsletter + free course announcements!
